فریمورک انتیتی عملیاتی ۶: دسترسی به پایگاه داده برای برنامههای سازمانی
Practical Entity Framework Core 6 : Database Access for Enterprise Applications
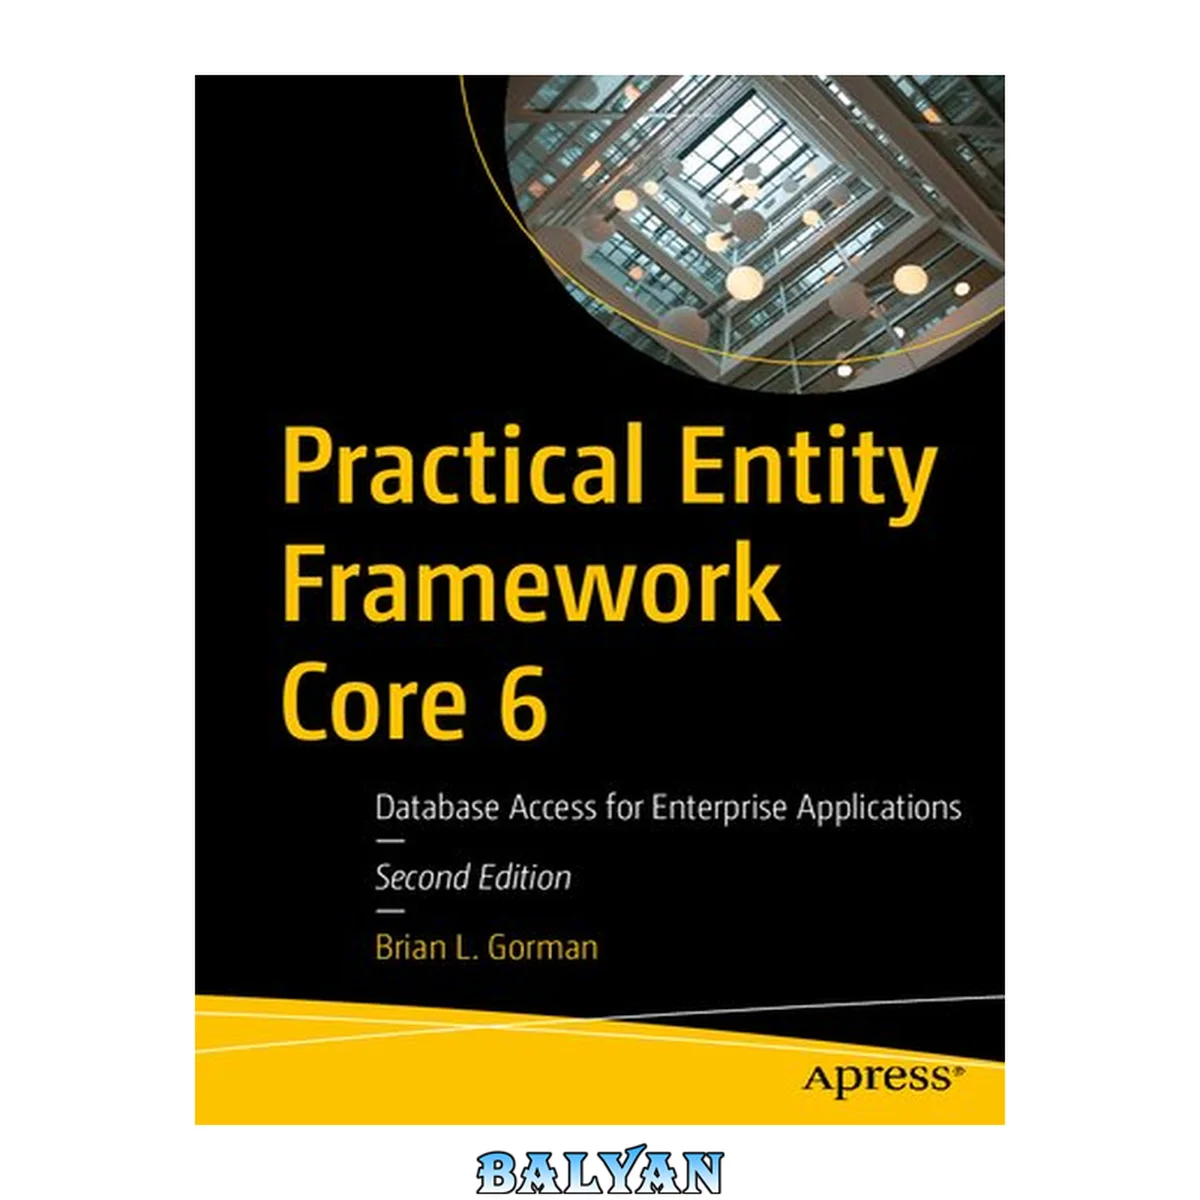
معرفی کتاب «فریمورک انتیتی عملیاتی ۶: دسترسی به پایگاه داده برای برنامههای سازمانی» (با عنوان لاتین Practical Entity Framework Core 6 : Database Access for Enterprise Applications) نوشتهٔ Jim، Sciutto و Brian L. Gorman، منتشرشده توسط نشر Apress : Imprint: Apress در سال 2021. این کتاب در فرمت pdf، زبان انگلیسی ارائه شده است.
Take a developer journey that paves the way to enterprise-level database access from .NET and C# using the object-relational mapper (ORM) of choice. This second edition is revised to cover Entity Framework Core 5 and 6 (EF) and includes new content on table-per-type mapping, LINQ improvements (filtered includes), many-to-many navigation changes, split queries, simple logging using the DBCommandInterceptor, and other improvements available in EF Core 6. Real-world examples and considerations are presented in this book to help you create robust and efficient database solutions. Throughout the text, actual problems, questions, and common pitfalls are provided to help you recognize optimal solutions for maximum success in the different application scenarios you might encounter. Practical Entity Framework Core 6 focuses on the code first approach to developing a database. Taking the code first approach allows the entire database to be built and maintained in code using EF Core 6 so there is never a situation in which you cannot restore the database schema. Additionally, the code first approach creates an entirely transparent record of changes to the database that is easily tracked in source control systems such as GitHub. Emphasis throughout the book is on leaving you well positioned to architect and lead data development efforts for your organization. What You Will Learn Build robust and maintainable databases using a code first approach Create and execute stored procedures, triggers, and functions Analyze and optimize performance of database queries Ensure data integrity through keys, constraints, and relationships Encrypt your database columns at rest with TDE and Always-On Encryption Leverage the FluentAPI and attributes for entity configuration Who This Book Is For .NET developers who work with enterprise-level applications and need to interact with data structures and data within the back end data store, developers who want to take a code first approach to building database applications to prevent conflicts and optimize efficiency, and those who are moving into full-stack roles, or into senior and architectural roles, and will be responsible for database design and implementation Table of Contents About the Author About the Technical Reviewer Acknowledgments Introduction Part I: Getting Started Chapter 1: Introduction to Entity Framework One, two, three, four versions? Oh my! When it all began OLEDb and spaghetti database access ADO.Net – A better tool for application database interaction A brief note about ADO.Net Entity Framework makes its debut Entity Framework and LINQ A new direction and a new visionary leader Microsoft goes all in for all developers A new vision requires a new path What is .Net 5 and why is Entity Framework called EFCore5 instead of EF5, and why are we already on .Net 6 and EFCore6 The state of the union The future Activity 1-1: Getting started with EFCore6 Task 1: Create a new project and add the EF packages Step 1: Create a new .Net 6 console project Step 2: Search and select Class Library Step 3: Name your project and select the storage location Step 4: Target the .Net 6 Framework Task 2: Add the EFCore6 packages to your project Step 1: Determine the latest version of Entity Framework Step 2: Add the Entity Framework libraries to your project Step 3: Create a DBContext Step 4: Alter your context to implement DbContext correctly Activity summary Chapter summary Important takeaways Closing thoughts Chapter 2: Working with an Existing Database Reverse-engineering or database first Why would we approach Entity Framework in this manner? Reverse-engineered solutions Keeping everything in sync Interacting with the existing database Activity 2-0: Working with a pre-existing database Task 1: Prerequisites Task 1-1: Prerequisite – SQL Server Developer edition (or SQL Express) Task 1-2: Prerequisite – SQL Server Management Studio (SSMS) Task 2: Download and restore the backup file for the latest version of the AdventureWorks database to your machine Task 2-1: Download the latest version of AdventureWorks DB Task 2-2: Restore the AdventureWorks database to your local SQL instance Activity 2-1: Reverse-engineering an existing database with EFCore5 Task 1: Creating the solution with a new project and referencing the DBLibrary project Step 1: Create the project and solution Step 2: Copy the EFCore_DbLibrary project to a local folder Step 3: Reference the code library that will be used to interact with the database Task 2: Ensure .Net 6 and update all of the NuGet packages for both projects Step 1: Ensure .Net 6 on the console project Step 2: Install the Entity Framework Tools (Microsoft.EntityFrameworkCore.Tools) NuGet package Step 3: Install the Entity Framework SQL Server (Microsoft.EntityFrameworkCore.SqlServer) NuGet package to both projects in the solution Step 4: Optionally, create a new GIT repository Task 3: Scaffold a new database context using the Scaffold-Context command Step 1: Install the Microsoft.EntityFrameworkCore.Design package to the EFCore_Activity0201 project using the PMC Step 2: Determine your connection string Step 3: Run the scaffold command Step 4: Repeat the scaffold operation, but change parameters Step 5: Run the original scaffolding operation to get all the files back Task 4: Create a settings file and leverage it from code Step 1: Add the appsettings.json file to store connection details Step 2: Add the libraries to leverage the config file in the activity project Step 3: Load up the config and leverage the results in the Main method of the Program.cs file in the activity project Task 5: Connect to the database and show results in code Step 1: Create the ability to connect and use the AdventureWorks DBContext Step 2: Query the data Step 3: Print the results to the console Activity summary Chapter summary Important takeaways Closing thoughts Chapter 3: Entity Framework: Code First Code first doesn’t always mean code first When not to use the code-first approach When to use the code-first approach Code first in an existing project Code first in a new project against a mature database Code first in a new project with a new database The benefits of a well-executed code-first development effort Ability to get up and running quickly A complete record of database changes in source control Agility when needing to revert to a previous state Shifting from declarative to imperative database programming It’s time to see code-first database programming in action A final thought before diving into the activities Activity 3-1: Creating a new code-first project against an existing database in EFCore6 Use the starter files or your project from Chapter 2 Task 1: Getting started with the activity Step 1: Getting the project started for the activity Step 2: Ensure that the project is ready to work with EFCore5 Task 2: Creating and reviewing the initial migration Step 1: Attempt to create a new migration Step 2: Create the initial migration Task 3: Comment out the initial migration, run the update, and review the database Step 1: Review the initial migration and then comment out the Up method and delete the code in the Down method Step 2: Run the update Task 4: Add a new migration, review it, remove it, and then add a real migration Step 1: Add a new migration without making any changes, review it, and remove it Step 2: Make a code change, and then add a new migration and update the database Step 3: Roll back the changes and remove the migration, and then remove the code change Activity 3-1 summary Activity 3-2: Creating a new code-first project in EFCore6 Task 1: Begin a new project for managing inventory Step 1: Set up a new project Step 2: Leverage a new database using the code-first approach Task 2: Add a new library for your database models – the “code” of code first Step 1: Create a new project library Step 2: Update the automatically generated Class1 to be an Item object Step 3: Set the project to be (or ensure that it is) a .Net 5 library Task 3: Reference the InventoryModels project and use it to create a migration Step 1: Add a project reference to the EFCore_DbLibrary for the InventoryModels Step 2: Add the Item class to the InventoryDbContext Step 3: Set the EFCore5_DbLibrary project to use the code-first database approach as a stand-alone library Step 4: Move the connection string out of the EFCore5_DbLibrary project Step 5: Create a new migration for the Inventory system Task 4: Update and review the database Step 1: Update the database Step 2: Review the database Task 5: Add code to insert and query a list of items Step 1: Create a method to ensure the existence of some Items Step 2: Write code to output the results Activity 3-2 summary Chapter summary Important takeaways Closing thoughts Part II: Building the Data Solution Chapter 4: Models and the Data Context What is the database context and why do we need it? DBContext vs. ObjectContext What is the DBContext? Constructing a new DBContext Critical properties and methods available when working with the DBContext Important properties on the DbContextOptionsBuilder object Important properties on the DBContextOptions object Important properties on the DBContext object Methods available on the DBContext Methods and extensions on the DBSet object Working with models Two immediate benefits of code-first models Building a database entity model A final thought about models Activity 4-1: Modifying the Item model Practical application for your daily routine Starter files Task 1: Creating the base project Step 1: Ensure the code is set up for the activity Step 2: Move the Configuration Builder Singleton class to a new project Task 2: Add properties to the Item class, and then use a migration to update the database with fields to match the properties Step 1: Add properties to the Item class Step 2: Add a new migration to get the properties into the database as fields on the Items table Step 3: Apply the migration and review the database structure Task 3: Add auditing to entities via inheritance Step 1: Create the interfaces in the Models project Step 2: Extend the FullAuditModel on the Item class to add auditing properties Step 3: Add the new migration and update the database Step 4: Review the database Activity 4-1 summary Activity 4-2: Using the ChangeTracker to inject some automated auditing Remember how you already set up the DBContext Common critical underlying objects The ChangeTracker is the lifeblood of our interaction with the Entity Framework Task 1: Getting started Step 1: Clean up the data, and then run the program Step 2: Add a method to delete all Items at the start of the program Task 2: Use the change tracker to inject auditing information on calls to save changes Step 1: Override the SaveChanges() method Step 2: Respond to the entity state in the change tracker Task 3: Add an update method to validate last modified auditing is working as expected Step 1: Add the update method Step 2: Update the Insert method to add a couple of Notes and Description information to the Items Activity 4-2 summary Chapter summary Important takeaways Closing thoughts Chapter 5: Constraints, Keys, and Relationships Constraining your data to enhance your solutions Size limitations Value constraints Default values Other data annotations Using keys in database tables for unique and relational results Working with relational data First, second, and third normal form First normal form (1NF) Second normal form (2NF) Third normal form (3NF) Types of relationships One-to-one relationships One-to-many relationships Many-to-many relationships Some final thoughts about relationships and normalization Activity 5-1: Add length, range, and other constraints to the Item model Creating constraints Prerequisite: Get set up for this activity Task 1: Setting length constraints on columns Step 1: Identify the fields that need constraints and create constants for the values Step 2: Add constraints to appropriate properties in the Item and FullAuditModel classes Step 3: Create the migration Step 4: Update the database Task 2: Creating a range on numeric fields Step 1: Add range values to the quantity and price fields Step 2: Create the migration Task 3: Ensuring a field is a key, making fields required, and setting default values on a column Step 1: Ensure the Id field is a key Step 2: Making some fields required (not able to be set to null – must have value) Step 3: Adding a default value to a field Task 4: Add a new migration and apply these changes to the database Step 1: Create the new migration Step 2: Update the database Step 3: Run the program Activity 5-1 summary Activity 5-2: Working with relationships Creating a one-to-many relationship Task 0: Getting started Task 1: Create the Categories in a one-to-many relationship with Items Step 1: Create the Category entity model Step 2: Create the one-to-many relationship Step 3: Create the migration Step 4: Review the database Task 2: Create a one-to-one relationship from Category to CategoryDetail Step 1: Create the CategoryDetail table Step 2: Create the one-to-one relationship for the Category to the CategoryDetail table Step 3: Create the migration and update the database Step 4: Review the ModelBuilder FluentAPI code in the migration Step 5: Update the database Task 3: Create a many-to-many relationship Step 1: Create a new Player entity Step 2: Create the new migration Step 3: Update the FluentAPI to name the fields as expected Step 4: Update the database Step 4: Review the database Step 5: Ensure the code executes Activity 5-2 summary Activity 5-3: Using a non-clustered, unique index Soft delete or hard delete, either way, just make sure it works Task 0: Getting started Task 1: Create the Genre Step 1: Add the Genre entity model Step 2: Add the migration and update the database Task 2: Create the ItemGenre and the many-to-many relationship Step 1: Create the ItemGenre entity model Step 2: Add references to the Item and the Genre classes to fully create the relationship Step 3: Create a new migration Step 4: Review the database to ensure the structure is as expected Task 3: Use the Index attribute to create a unique, non-clustered index Step 1: Add the Index to the ItemGenre class Step 2: Add the migration Step 3: Review the database Step 4: Ensure the code executes Activity 5-3 summary Chapter summary Important takeaways Closing thoughts Chapter 6: Data Access (Create, Read, Update, Delete) CRUD LINQ Basic interactions Leverage the DbSet objects Common commands A final thought before diving into the activities Activity 6-1: Quick CRUD with scaffolded controllers Task 0: Getting started Task 1: Creating the new MVC project Step 1: Setup Step 2: Review the connection string Step 3: Review the project setup Step 4: Review the Startup.cs file Step 5: Get your Models project into the solution but do not reference them yet Task 2: Start working with the ASP.Net MVC project Step 1: Update the database Step 2: Run the project and register a couple of users Step 2: Import the InventoryModels project Step 3: Add a migration and update the database Step 4: Review the database Task 3: Create CRUD for the items Step 1: Scaffold the Items controller and views Step 2: Review the Items controller that was generated Step 3: Run the project to see the CRUD operations in action Activity 6-1 summary Chapter summary Important takeaways Closing thoughts Chapter 7: Stored Procedures, Views, and Functions Understanding stored procedures, views, and functions Stored procedures Advantages of stored procedures Creating a stored procedure Functions Advantages of functions Examples of functions Views Advantages of views Examples of using views Setting up the database to run scripts efficiently The problem The solution Fluent API What can you do with the Fluent API How do you work with the Fluent API Working with the database objects A final thought before diving into the activities Activity 7-1: Working with stored procedures Task 0: Getting started Task 1: Create a new stored procedure using inline code in your migration Step 1: Design the stored procedure Step 2: Create the migration for adding the GetItemsForListing stored procedure Step 3: Validate that the migration was applied Task 2: Create the extension method to use local files for scripting Step 1: Create the folder to store your script files Step 2: Create the extension Step 3: Update the scripts and create the migration Step 4: Leverage the extension in a new migration Task 3: Apply the migration Step 1: Run the update database command to see the error Step 2: Fix the error Step 3: Run the update database command to apply the migration Step 4: Review your database to ensure changes happened as expected Task 4: Leverage the stored procedure in code Step 1: Execute and use the results from the stored procedure Step 2: Use the Fluent API to map out a result set entity for the stored procedure Activity 7-1 summary Activity 7-2: Working with functions, the FluentAPI, and seed data Task 0: Getting started Task 1: Script out a new scalar-valued function Step 0: Eliminate the call to DeleteAllItems Step 1: Explore scalar-valued functions Step 2: Create the script Step 3: Add a new migration and update the database Step 4: Validate that the function was added as expected Task 2: Leverage the new function from code Step 1: Add a new DTO to map the result of the function Step 2: Add the DTO as a DbSet in the InventoryDbContext Step 3: Add a call in the Program file to get the results to the UI Task 3: Create a new table-valued function Step 1: Create the new function Step 3: Review the changes to the database Step 3: Create the DTO for mapping function results Step 4: Use the new function and show results in the UI layer Task 4: Seed data with the Fluent API Step 1: Seed data using the Fluent API Task 5: Seed data with a custom solution Step 1: Roll your own custom migrator Step 2: Run migrations and execute custom seed builders Step 3: Create the BuildCategories custom seed class Step 4: Create a migration to apply changes and seed Genre data Step 5: Review the database to ensure changes are applied and data exists as expected Task 6: Seed the Players and Items data Step 1: Create the Item SeedBuilder Step 2: Seed the Items and Players Step 3: Remove the calls to EnsureItems, UpdateItems, and DeleteAllItems methods from the Main method code in the EFCore_Activity0702 project Activity 7-2 summary Activity 7-3: Working with views Task 0: Getting started Task 1: Create the view Step 1: Write the script Step 2: Add the new migration and update the database Step 3: Validate the view was created and works Task 2: Expose the view data from the UI layer Step 1: Create a DTO object to model the view data Step 2: Add the DbSet to the InventoryDbContext, and update the OnModelCreating method Step 3: Leverage the data from the UI Activity 7-3 summary Chapter summary Important takeaways Closing thoughts Chapter 8: Sorting, Filtering, and Paging It’s time to learn LINQ LINQ is generally not the problem Use a profiler or another tool Issues and solutions Issue #1: Pre-fetching results and then iterating in code to filter the results Issue #2: Not disconnecting your data Issue #3: IEnumerable vs. IQueryable Practical application Activity 8-1: Sorting, paging, and filtering Task 0: Getting started Task 1: Compare the execution efficiency of two queries Step 1: Create two new methods to house the different queries Step 2: Analyze the two queries with the SQL Query Analyzer Task 2: Filtering our results Step 1: Implement the method to allow a user to filter results Step 2: Analyze the query Task 3: Paging the filtered results Step 1: Create the method to filter and page the results Step 2: Analyze the query results Task 4: Disconnecting the result sets Step 1: Set the code to use queries AsNoTracking Step 2: Discuss setting the entire context to disable tracking of entities by default Activity 8-1 summary Chapter summary Important takeaways Closing thoughts Part III: Enhancing the Data Solution Chapter 9: LINQ for Queries and Projections Data in the real world LINQ vs. stored procedures Complex data and the code-first approach DTOs, view models, or domain models Decoupling your business or view logic from the database Sometimes, a pre-defined object is overkill One tool to rule them all AutoMapper Chapter 9 activities: Using LINQ, decoupled DTO classes, projections, anonymous types, and AutoMapper Activity 9-1: Working with LINQ in complex queries Task 0: Getting started Task 1: Get all the salespeople Step 1: Quickly comment out other method calls to get them out of the way Step 2: List out the salespeople and their important metrics Step 3: Use navigation properties to get the data Task 2: Use projections to get more efficient queries Step 1: Add the new method Step 2: Filter and sort the data Step 3: Project the data to a DTO Activity 9-1 summary Activity 9-2: Setting up AutoMapper Task 0: Getting started Task 1: Get AutoMapper packages and configure the solution Step 1: Get the NuGet packages Step 2: Create the InventoryMapper profile Task 2: Create the DTO objects Step 1: Create the Item DTO Step 2: Create the Category DTO Task 3: Set up the program to use AutoMapper and configure mappings Task 4: Leverage AutoMapper in your solution Activity 9-2 summary Activity 9-3: Working with AutoMapper Task 0: Getting started Step 1: Get the files Step 2: Seed more data Step 3: Run the program to validate output Task 1: Perform a more advanced query Step 1: Build a new GetItemsForListing query Step 2: Update the DTO so that it maps to the query result Task 2: Using AutoMapper and DTO projections Step 1: Use AutoMapper projections Step 2: Use AutoMapper when the fields don’t line up one to one Activity 9-3 summary Chapter summary Important takeaways Closing thoughts Chapter 10: Encryption of Data Keeping your system’s data secure Data at rest Encryption in the past vs. encryption today Passwords SSO via social logins ASP.Net built-in authentication Salting and hashing Protecting sensitive user information Encryption basics Which type should you use Chapter 10 activities: Using Always Encrypted and Transparent Data Encryption Activity 10-1: Using Always Encrypted Task 0: Getting started Task 1: Enable Always Encrypted on the InventoryManagerDb Step 1: Create a backup [optional] Step 1: Prepare fields for encryption Step 2: Encrypt the three columns Name, Description, and Notes Step 3: Review the data Step 4: Modify SSMS to decrypt your columns automatically Step 5: Run the application Step 6: Fix an issue with a join after Always Encrypted is on Step 7: Fix the remaining issues Activity 10-1 summary Activity 10-2: Using Transparent Data Encryption Task 0: Getting started Task 1: Plan the migration strategy Step 1: Evaluate the process to ensure data integrity Step 2: Determine the columns you want to encrypt Task 2: Create the backup columns Step 1: Add the columns to the model Step 2: Add the migration and update the database Step 3: Run a script to back up the data for the target columns Task 3: Create the keys and certificates Step 1: Create the folder to store the keys Step 2: Create the certificate and key Task 4: Drop constraints on the targeted columns Step 1: Drop the existing constraints Task 5: Drop the columns that are going to be targeted for encryption, and then recreate them Step 1: Drop the existing columns Step 2: Recreate the target fields Task 6: Select the backup data, transform it for encryption, and store it in the original columns Step 1: Encrypt all the data from backup columns into the new original columns Step 2: Validate the data Task 7: Clean up the table Step 1: Remove the properties from the Employee model Step 2: Create the migration and update the database Activity 10-2 summary Chapter summary Important takeaways Closing thoughts Chapter 11: Repository and Unit of Work Patterns The repository (Repo) pattern Sources of information about the repository pattern The repository pattern abstracts the database plumbing code from the implementation Entity Framework’s built-in repository The unit of work pattern Using a unit of work Combining the repository and the unit of work The one-two punch A couple of drawbacks In general, rely on EF Separation of concerns Logical separation of concerns Final benefits of separation of concerns Chapter 11 activities Activity 11-1: Layering your solution Task 0: Getting started Task 1: Creating the database layer Step 1: Create the new project for the database layer Step 2: Rename the Class1.cs file Step 3: Add an interface to define the ItemsRepo operations Step 4: Add a Categories Repo and interface Task 2: Creating the business layer Step 1: Create the business layer class and interface Task 3: Create and implement database operations in the database layer Step 1: Reference existing projects Step 2: Add the inventory database Repo interface method signatures, and implement them Step 3: Complete the CategoriesRepo and ICategoriesRepo code Task 4: Create and implement business operations in the service layer Step 1: Add a project reference for the InventoryDatabaseLayer to the InventoryBusinessLayer Step 2: Add method declarations for IItemsService and the code for the ItemsService Step 3: Add method declarations for ICategoriesService and the code for the CategoriesService Task 5: Refactor the console program Step 1: Add a reference to the business layer project in the main activity project Step 2: Clean up the Program.cs file Step 3: Update the Program.cs file constructor and methods Step 4: Update the methods to leverage the service Step 5: Run the program to see results Activity 11-1 summary Activity 11-2: Rolling your own UoW Transactions are easy and effective Use the using statement for transaction lifecycles Task 0: Getting started Task 1: Modify the InventoryDatabaseLayer Step 1: Update the GetItems method to return objects of type Item Step 2: Add the new method signatures to the interface and implement them Task 2: Modify the InventoryBusinessLayer Step 1: Modify the IItemsService interface and add a new DTO Step 2: Modify the ItemsService to implement the new methods Task 3: Build the insert logic Step 1: Add the code to add insert functionality Step 2: Run the program and insert some items Task 4: Build the update logic Step 1: Add the code to add update functionality Step 2: Run the program and update some items Task 5: Build the delete logic Step 1: Add the code to add delete functionality Step 2: Run the program and delete some items Task 6: Update the transaction scope Step 1: Learning about the transaction scope Step 2: Update the transaction scope for UpsertItems Step 3: Update the transaction scope for delete items Step 4: Run the program to ensure it still works Activity 11-2 summary Chapter summary Important takeaways Closing thoughts Chapter 12: Unit Testing, Integration Testing, and Mocking Testing your code is a must-have, not a nice-to-have The code needs to be changed The database is the lifeblood of the application Testing saves your sanity and protects the system Two different approaches leading to the ability to test changes Unit testing Libraries utilized Integration testing Activities for Chapter 12 Activity 12-1: Unit testing with mocking Mocking for your tests Task 0: Getting started Task 1: Add the unit testing project to the solution Step 1: Add the testing project Step 2: Rename the UnitTest1.cs file and class Task 2: Write your first unit test Step 1: Add a reference to the service layer and ensure the Target Framework Step 2: Write the first unit test Task 3: Get and implement Moq Step 1: Use the NuGet Package Manager to get Moq Step 2: Implement a mock database layer using the Moq library Step 3: Bring in AutoMapper and the AutoMapper mappings file Step 4: Initialize the mapper Task 4: Refactor the InventoryBusinessLayer to be context independent Step 1: Add a new constructor to the InventoryBusinessLayer ItemsService class Step 2: Fix the unit test to create the items service Task 5: Run the unit test and refactor Step 1: Run the unit test Step 2: Refactor the code in the InventoryMapperUnitTest class Step 3: Refactor the database mocking Step 4: Get Shouldly Step 5: Run the test Activity 12-1 summary Activity 12-2: Integration testing with an in-memory database Task 0: Getting started Task 1: Create a new xUnit project Step 1: Create and set up the new xUnit Test Project Step 2: Get NuGet packages that are needed for this solution Task 2: Set up the expected data for seeding and integration testing Step 1: Configure the database, AutoMapper, and constant variables for the tests Step 2: Set the data Task 3: Write integration tests Step 1: Test the GetItems method using an xUnit Fact test Step 2: Test the CategoryDetails with an xUnit Theory test Task 4: Refactor the code Activity 12-2 summary Chapter summary Unit tests Integration tests Shouldly and xUnit Dependencies and injection to decouple layers Chapter 13: Asynchronous Data Operations and Multiple Database Contexts Asynchronous operations Multithreaded programming Async, await, and the TaskParallelLibrary Responsive solutions for the end user Asynchronous database operations Basic asynchronous syntax Multiple database contexts Single sign-on (SSO) Business units Multiple contexts require a bit more work Putting it into practice Activity 13-1: Asynchronous database operations Task 0: Getting started Task 1: Refactor the database layer Step 1: Modify the interfaces Step 2: Rework the implementations Task 2: Refactor the integration tests Step 1: Refactor the integration tests Step 2: Run the integration tests Task 3: Refactor the business layer Step 1: Modify the interfaces Step 2: Rework the implementations Task 4: Refactor the unit tests Step 1: Refactor the unit tests Step 2: Run the unit tests Task 5: Refactor the main program Step 1: Modify the Main method to be asynchronous Step 2: Modify the helper methods to be asynchronous Step 3: Make the calls in the Main method asynchronous Step 4: Run the program Step 5: Fix issues with encryption and asynchronous operations Step 6: Fix the batching operations with asynchronous calls Task 6: Fix a broken integration test Step 1: Run the unit and integration tests Activity 13-1 summary Activity 13-2: Multiple database contexts Task 0: Getting started Task 1: Inject both contexts into the solution, and learn about working with multiple contexts Step 1: Inject the InventoryDbContext into the web solution Step 2: Run the initial migration for identity and ensure no pending migrations exist Step 3: Run the program and ensure you can register a user and log in as the user Task 2: Scaffold Category pages Step 1: Scaffold Category Details Step 2: Run the solution and review the output Step 3: Delete the CategoryDetails and add Categories Task 3: Ensure solid learning on the database context Step 1: Add a new migration Step 2: Update the database Step 3: Roll back the migration Step 4: Remove the migration Activity 13-2 summary Chapter summary Important takeaways Closing thoughts Part IV: Recipes for Success Chapter 14: .Net 5 and EFCore5 One framework to rule them all, with more coming EF6, EFCore, and .Net 5/6/7/... .Net 6/7 and EFCore6/7 Changes with EFCore5 Activity 14-1: Many-to-many navigation properties Task 0: Getting started Task 1: Review the existing relationships Step 1: Review the Item and Genre many-to-many relationship Step 2: Review the Item and Player many-to-many relationship Task 2: Explore this implicit mapping Step 1: Modify the program to review the entity relationships Step 2: Review the model builder as it was used to modify the ItemPlayers table Activity 14-1 summary Activity 14-2: Filtered include Task 0: Getting started Task 1: Create the method and set up the filtered include query Step 1: Create the new method Step 2: Determine the T-SQL is working Step 3: Write an alternate query using projections Task 2: Fix the original query Step 1: Examine the issue Step 2: Use AsNoTracking in your queries Activity 14-2 summary Activity 14-3: Split queries Task 0: Getti
دانلود کتاب فریمورک انتیتی عملیاتی ۶: دسترسی به پایگاه داده برای برنامههای سازمانی